Tutorial: Designing Smocking Plates in Illustrator Pt 2
Posted by Claire on Feb 18 2011, in Smocking, Tutorial
17. Complete steps 1-14 in pt 1.
18. Select all (Hotkey: CTRL+A). All of the full and half stitches will be highlighted in blue.

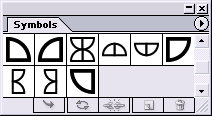
19. In the Symbols window, click on the button along the bottom edge that looks like a broken chain, “Break link to symbol”. TIP: You must break the link with the symbol in order to change the symbol’s colour, size or other attributes. The half stitches in the design are now ordinary vector shapes, not symbols, and can be changed at will. Deselect the heart by clicking away from the highlighted shape.

20. Using the Selection tool (Hotkey: V), click on one half stitch. It will be highlighted. From the upper toolbar choose Select>Same>fill colour.

All of the white half stitches will be selected, because they have the same colour as the first half stitch.

21. Leaving the half stitches highlighted, click on the eyedropper (Hotkey: I) and using the eyedropper, click on one of the purple cables. All of the half stitches are now purple.

22. Deselect all of the cables by clicking CTRL+SHIFT+A.
23. In the Layers window, lock the “cables” layer. Unlock the “row” layer and click on the layer so that it is highlighted. You are now working on the row layer.

24. In the symbols window, choose the “Title” symbol. Drag the symbol onto the graph and centre it near the top. Click on the “Break link to symbol” button.

25. Select the Type Tool (Hotkey: T). Click on the font inside the title box and change the title to “Hearts” and add your name as designer.

26. From the symbols window, choose the “row numbers” symbol. Align the box on the left hand side of the graph, centring it over the uppermost row. With the box highlighted, click on the “Break link to symbol” button.

27. Change the keyboard increment by using Hotkey: K. The keyboard increment window will appear. Change the measurement to 16mm and click OK.

28. Using the selection tool, (Hotkey: V), make sure the numbering box is highlighted. With the box highlighted, hold down the ALT key. The arrow will change from a single black arrow to a double black and white arrow. This means that the object you have selected will be copied. Still holding down the ALT key, tap the down arrow key. Each time you do so, a new numbering box will appear exactly 16mm below the previous one. Duplicate the boxes until you have one for each row.

29. Using the Type Tool (Hotkey: T), renumber the boxes 1 thru 9, with holding rows at the top and bottom.

30. Lock the “row” layer in the layer window. Click on the images layer and make it invisible by clicking on the “eye” symbol.

31. Unlock the “cable” layer. Click on the layer to work on it.

32. Oops. The purple colour just isn’t right. Highlight the cables by clicking CTRL+A.

33. Click on the colour swatch in the bottom corner. (Hotkey: X) Change the CMYK colour to C 6, M 92, Y 50, K 1.

34. Your red heart is now complete. Save the document. File>Save As>Tutorial1yourname.
Next Friday, Feb. 25th, I’ll post the second tutorial. This tutorial will tackle tracing and more complex, multi-coloured picture smocking shapes. As always, if you have any questions, just ask!
You are welcome to share this tutorial with friends and link to it on your own blog or website. Please remember to credit my site.